Most people who snowmobile in New England have seen the NERFC Snow Depth map and have used it to figure out where the most snow is so they can load up the sleds and hit the trails. The National Weather Service - (NOAA) provides a number of snow related maps in addition to the popular Snow Depth map. We will show you how to combine the snow depth map with Google Earth and our snowmobile trail maps for the perfect way to find the best riding conditions. Best of all, you can have this integrated map on your desktop, laptop, tablet and smartphone!
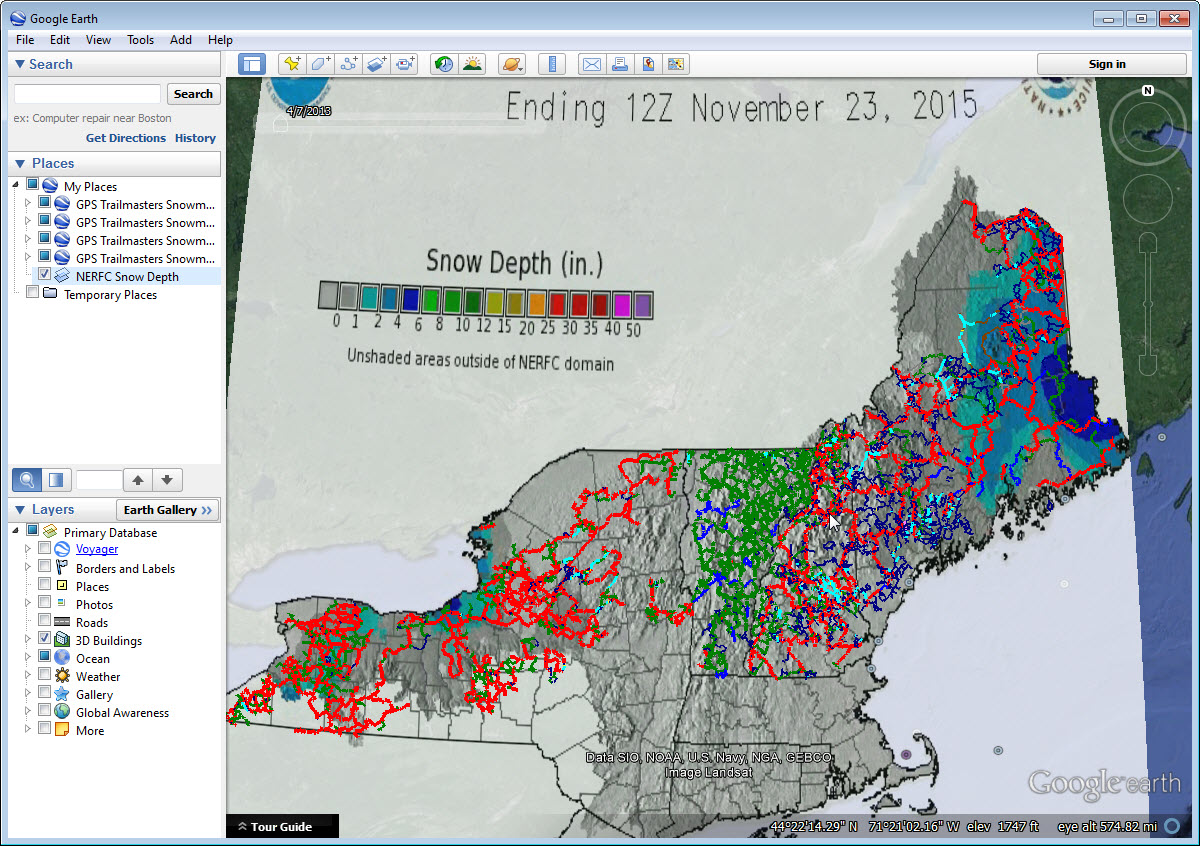

Google Earth has the ability to georeference images relative to their location on the earth. A georeferenced image can be loaded into a Garmin GPS that supports Garmin Custom Maps and is also necessary for our combined trail and snow depth map. The steps below are for installing on your desktop or laptop computer. If you don’t already have Google Earth installed on your Windows or Macintosh computer, download the standard or Pro version here. Either version will work equally well.
TIP: While navigating in Google Earth, the image may start to rotate off of North. To reset the map with north up, click the “N” above the rotation control in the upper right corner of the display.
Our X Package map products include Google Earth compatible KMZ map files. These files are stored on your computer. Windows users can click the “X Package” shortcut on the desktop. Mac users can find the GPS Trailmasters files in their home User folder. The KMZ files are broken down by state, so if you purchased multiple states, each file will need to be opened with Google Earth.
1. Open your GPS Trailmasters' KMZ snowmobile maps from within Google Earth by clicking the File -> Open menu and selecting one or more KMZ files from your computer.

2. After the files are loaded into Google Earth, they will be listed under Temporary Places. They need to be moved to My Places. Select the file, right-click, select Save to My Places.
3. Expand each .kmz file under My Places so “Point Features” and “Line Features” are shown. Disable the Point Features to remove clutter.
4. For your convenience, we have georeferenced the snow depth map and made it available to download to your computer.
5. Navigate to your Downloads folder or the location where the downloaded snow depth map was saved and open the file with Google Earth.
6. Within Google Earth, move the NERFC Snow Depth map to the My Places folder; Select the NERFC Snow Depth map, right-click, select Save to My Places.
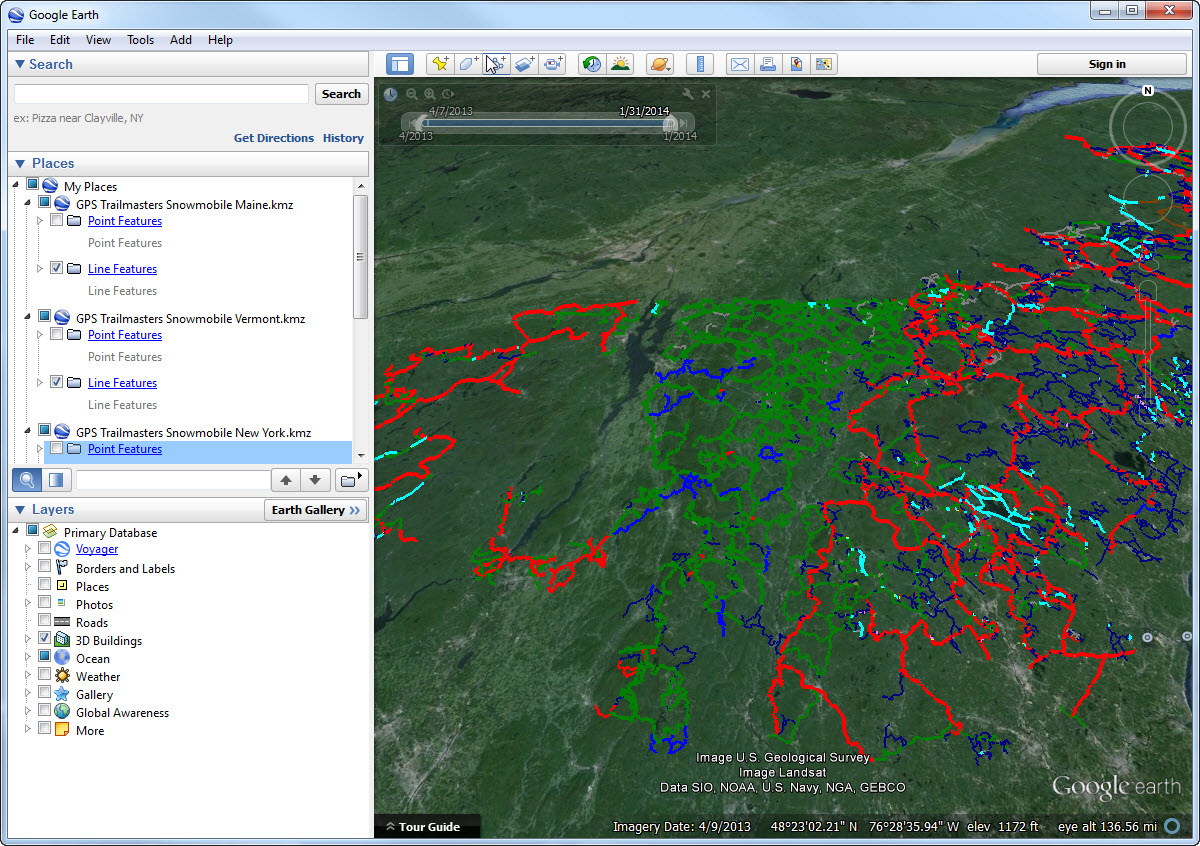
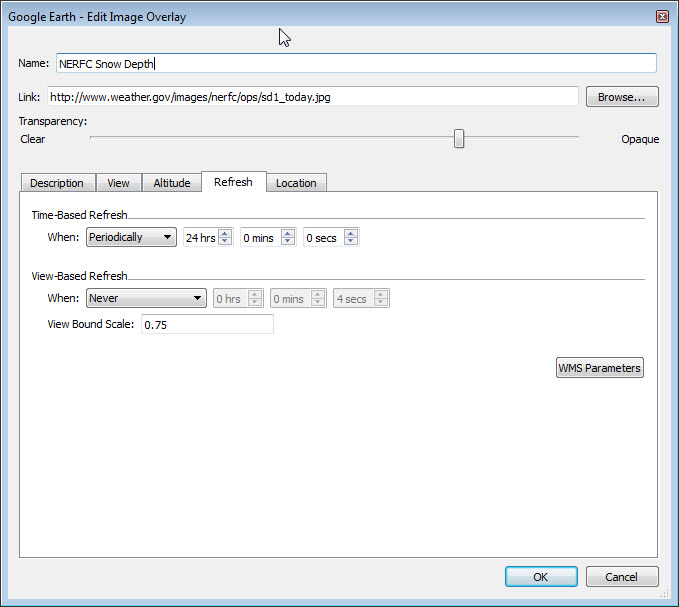
7. If you need to change any of the NERFC Snow Depth map properties, particularly the transparency or refresh interval, select the NERFC Snow Depth map under My Places, right-click, select Properties.
8. The image should automatically update each day. Depending on when the refresh interval was set, the image may not update exactly at midnight but sometime later in the day. Make sure the NERFC Snow Depth map is listed under My Places and not Temporary Places.
9. You can re-enable Point Features to see gas, food and lodging POIs on the map.

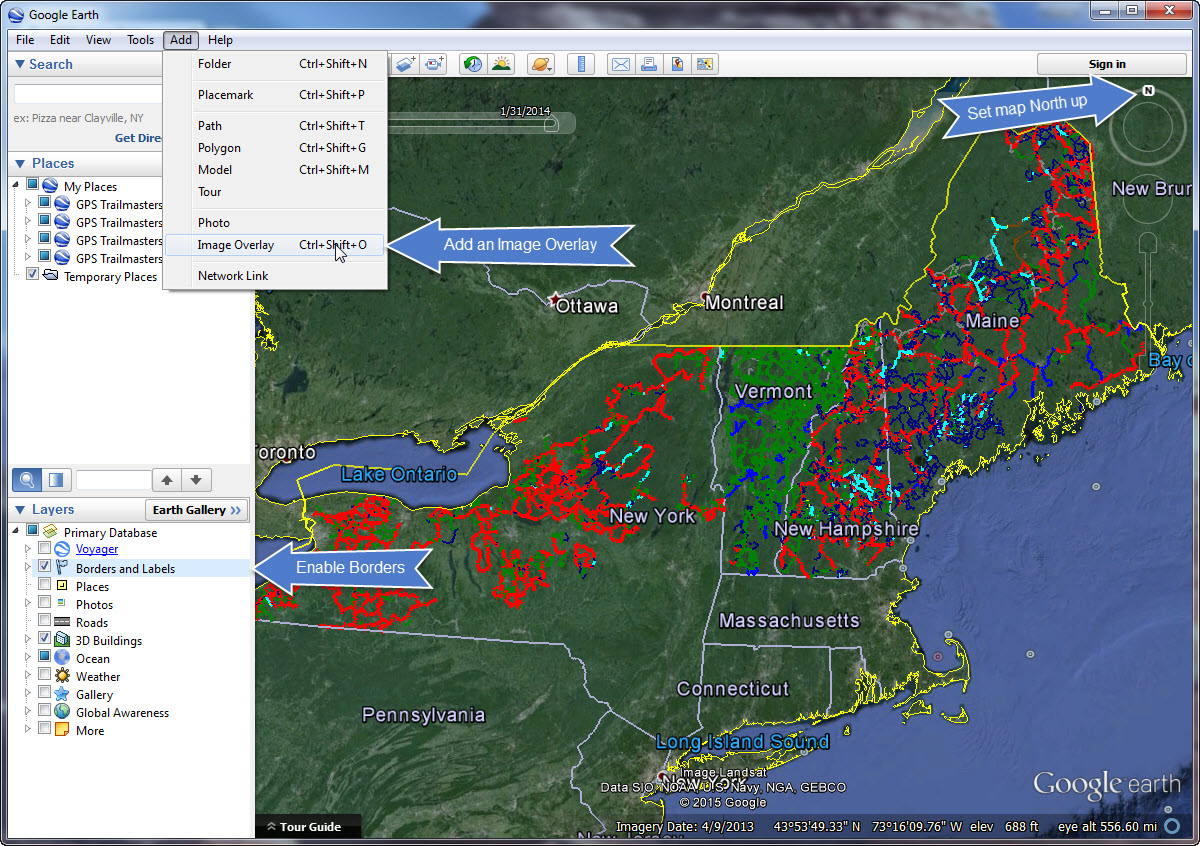
Georeference a Snow map using Google Earth
In Google Earth zoom out to the extent of your snow map (e.g., Maine to New York ) and enable “Borders and Labels” in the Layers section to help with georeferencing – also set north up by clicking the “N” above the rotation control in the upper right corner. In Google Earth, from the main menu select Add -> Image Overlay. The New Image Overlay dialog will appear. Enter a name in the “Name:” field such as “NERFC Snow Depth”.
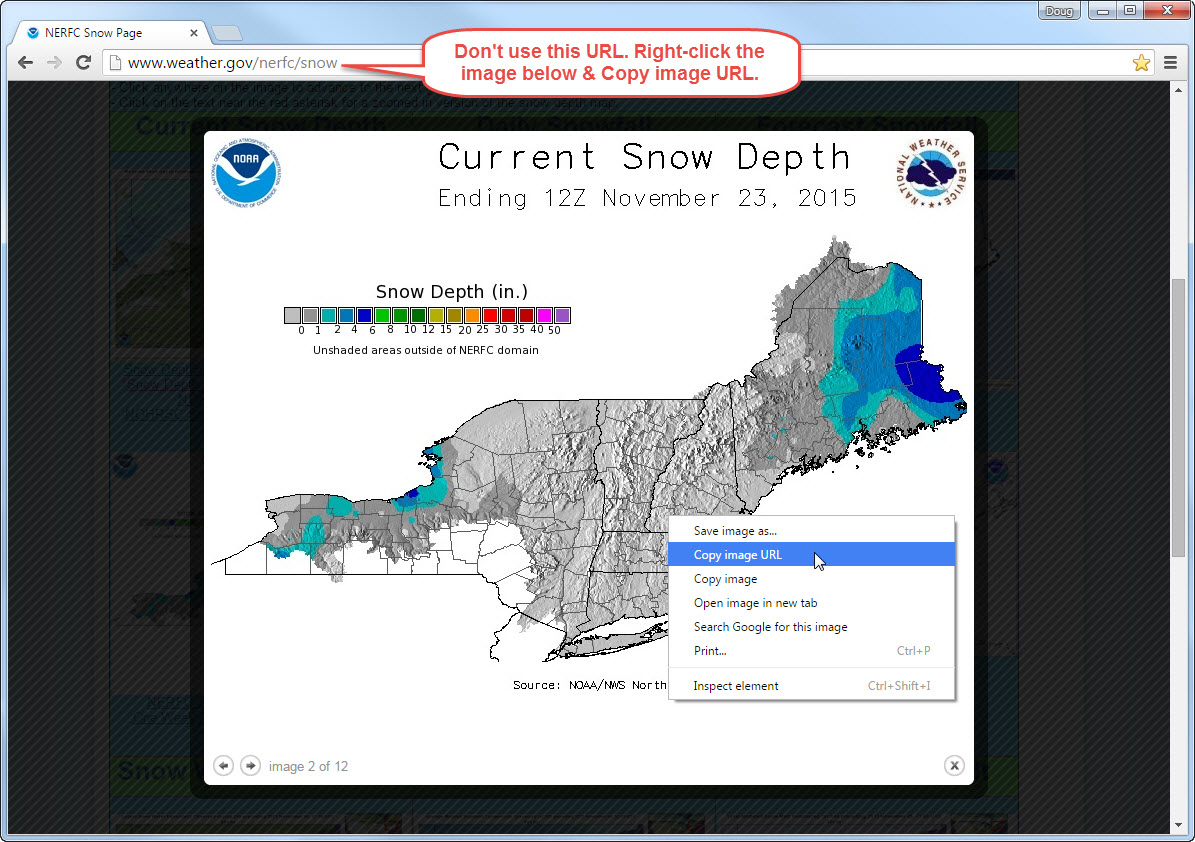
We now need to get the link for the snow map. In your Web browser, navigate to the NERFC Snow page: http://www.weather.gov/nerfc/snow. There are many “Snow” related maps here that could be georeferenced but we are going to click on the “Current Snow Depth” map. Copy the URL for the map. Don’t use the URL in the address bar of the browser, instead position the mouse over the snow map image, right-click, select Copy Image URL.
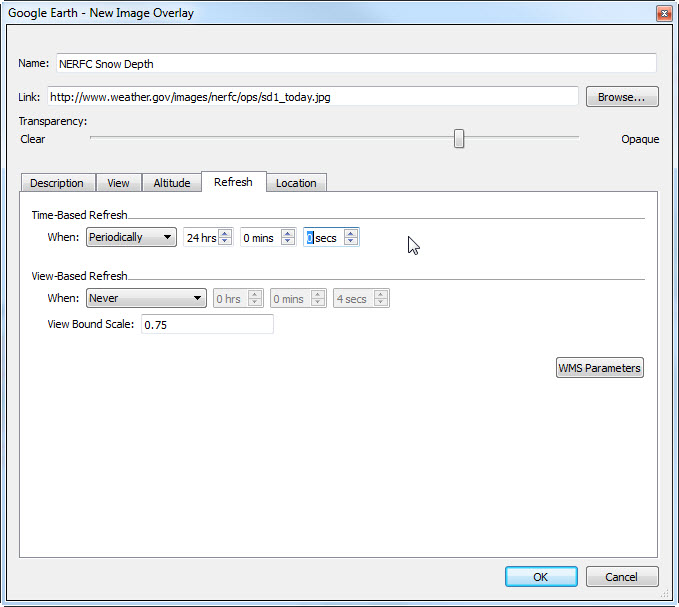
Paste the URL into the “Link:” field of the New Image Overlay dialog. Use ctrl-v or right-click and select Paste. You can adjust the Transparency slider to see more of the google earth map underneath if you want but the yellow borders make a good reference. It’s important to set a “Refresh” interval so that your snow depth map is automatically updated daily. In the New Image Overlay dialog, select the "Refresh" tab. In the “Time-Based Refresh” section set “When:” to “Periodically” and set the time to 24 hrs.
You now need to georeference the image. Click the “Location” tab within the New Image Overlay dialog. The snow depth map should be displayed with green image guides at the edges, corners and center of the map. Zoom out if necessary to see the green image guides. With the mouse click and drag the edges/corners to resize and rotate the image so the state boundaries on the snow depth map line up with the yellow borders shown in Google Earth. Use the green center guide to reposition the entire map. Once you have the image lined up, click OK to close the New Image Overlay dialog. Make sure the NERFC Snow Depth map is listed under My Places and not Temporary Places. Select the NERFC Snow Depth map, right-click, select Save to My Places.

You can also watch the tutorial video.

